In this article, you will examine how to create a contact form in PHP and protect it with Google’s reCAPTCHA v2.
Prerequisites
- A working PHP environment
- The php-curl extension installed
- A site registered with Google reCAPTCHA
Creating the HTML Document
We will begin with a simple HTML document that uses Materialize.css as the default styling.
<!DOCTYPE html>
<html lang="en">

<head>
    <title>Contact us</title>
    <meta name="viewport" content="width=device-width, initial-scale=1.0" />
    <!-- Compiled and minified CSS -->
    <link rel="stylesheet" href="https://cdnjs.cloudflare.com/ajax/libs/materialize/1.0.0/css/materialize.min.css">

</head>

<body>
    <div class="container">
        <h2>Contact us</h2>
        <div class="row">
            <form id="contactForm" class="col s12">
                <div class="row">
                    <div class="input-field col s6">
                        <input placeholder="Your name" id="formName" name="name" type="text" class="validate">
                        <label for="formName">Your name</label>
                    </div>
                    <div class="input-field col s6">
                        <input placeholder="Email address" id="formEmail" name="email" type="email" class="validate">
                        <label for="formEmail">Email address</label>
                    </div>
                </div>
                <div class="row">
                    <div class="input-field col s12">
                        <textarea id="formMessage" name="message" class="materialize-textarea"></textarea>
                        <label for="formMessage">Your message</label>
                    </div>
                </div>
                <button class="btn waves-effect waves-light" type="submit" name="action">Submit</button>
            </form>
        </div>
    </div>
    <!-- Compiled and minified JavaScript -->
    <script src="https://cdnjs.cloudflare.com/ajax/libs/materialize/1.0.0/js/materialize.min.js"></script>
    <script type="text/javascript">
        // Our JavaScript logic goes here
    </script>
</body>

</html>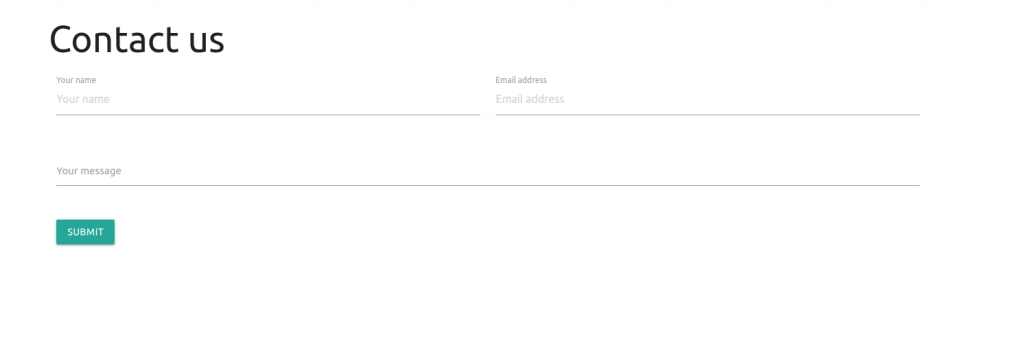
Writing the Form Submission Logic
We will attach a submit event to the contactForm element, when the submit event is called via the submit button we will prevent it from executing and use the Fetch API to submit our form to the server manually using the FormData interface without the need to refresh the web page.
contactForm.addEventListener('submit', (event) => {
    // Prevents the form from submitting a request
    event.preventDefault();
    let formData = new FormData(contactForm);

    fetch('submit_form.php', {
        method: 'POST',
        body: formData
    }).then(response => response.json().then(data => ({
        status: response.status,
        body: data
    })))
    .then(obj => {
        if(obj.status !== 200) {
            // Materialize toast
            M.toast({html: obj.body.result});
        } else {
            M.toast({html: "Thank you for contacting us. We'll reach out to you shortly."});
            contactForm.reset();
        }
    });
});
Creating a Database Table
We will use SQL to store the contact submissions inside a database table. You can use the following SQL query to create a contact_us table.
CREATE TABLE `contact_us` (
  `id` INT UNSIGNED NOT NULL AUTO_INCREMENT,
  `name` varchar(255) COLLATE utf8mb4_unicode_ci NOT NULL,
  `email` varchar(255) COLLATE utf8mb4_unicode_ci NOT NULL,
  `message` varchar(255) COLLATE utf8mb4_unicode_ci NOT NULL,
  `submission_date` date DEFAULT NULL,
  PRIMARY KEY (`id`)
) ENGINE=InnoDB DEFAULT CHARSET=utf8mb4 COLLATE=utf8mb4_unicode_ci;
Processing the Form via PHP
We will create a file called submit_form.php that will process any POST request that is sent by our HTML document.
<?php
/**
 * Echos data as json and terminates the script.
 *
 * @param mixed $data The data to output as JSON.
 * @return void
 */
function echo_data_exit($data) {
    echo json_encode($data);
    exit;
}

// Prevent any requests from going through except for POST
if($_SERVER['REQUEST_METHOD'] !== 'POST') {
    http_response_code(405);
    echo_data_exit(['result' => "The method {$_SERVER['REQUEST_METHOD']} is not allowed for this page."]);
}

// Server-side form validation
if(!isset($_POST['name']) || !isset($_POST['email']) || !isset($_POST['message'])) {
    http_response_code(400);
    echo_data_exit(['result' => 'Bad request']);
}

if(empty($_POST['name'])) {
    http_response_code(400);
    echo_data_exit(['result' => 'Please enter a name']);
}

if(!filter_var($_POST['email'], FILTER_VALIDATE_EMAIL)) {
    http_response_code(400);
    echo_data_exit(['result' => 'Please enter a valid e-mail address']);
}

if(empty($_POST['message'])) {
    http_response_code(400);
    echo_data_exit(['result' => 'Please enter a message']);
}

// reCAPTCHA v2 validation will go here.

// Form processing
$sql_servername = 'localhost';
$sql_username = 'username';
$sql_password = 'password';
$sql_database = 'database';

// Creates a PDO connection instance
$conn = new PDO("mysql:host=$sql_servername;dbname=$sql_database", $sql_username, $sql_password);
// Set the PDO error mode to exception
$conn->setAttribute(PDO::ATTR_ERRMODE, PDO::ERRMODE_EXCEPTION);

try {
    // Prepare SQL
    $statement = $conn->prepare('INSERT INTO contact_us (name, email, message, submission_date) VALUES (:name, :email, :message, :submission_date)');
    $date = date("Y-m-d H:i:s", time());

    // Bind parameters
    $statement->bindParam(':name', $_POST['name'], PDO::PARAM_STR);
    $statement->bindParam(':email', $_POST['email'], PDO::PARAM_STR);
    $statement->bindParam(':message', $_POST['message'], PDO::PARAM_STR);
    $statement->bindParam(':submission_date', $date, PDO::PARAM_STR);

    // Insert the row
    $statement->execute();
} catch (Exception $ex) {
    // Uh-oh! Something bad happened.
    http_response_code(500);
    echo_data_exit(['result' => 'Internal server error']);
}
http_response_code(200);
echo_data_exit(['result' => 'OK']);
Registering reCAPTCHA v2 Keys
You can generate a site key and a secret key in the reCAPTCHA admin panel page. You will be presented with a form asking you for a few details.
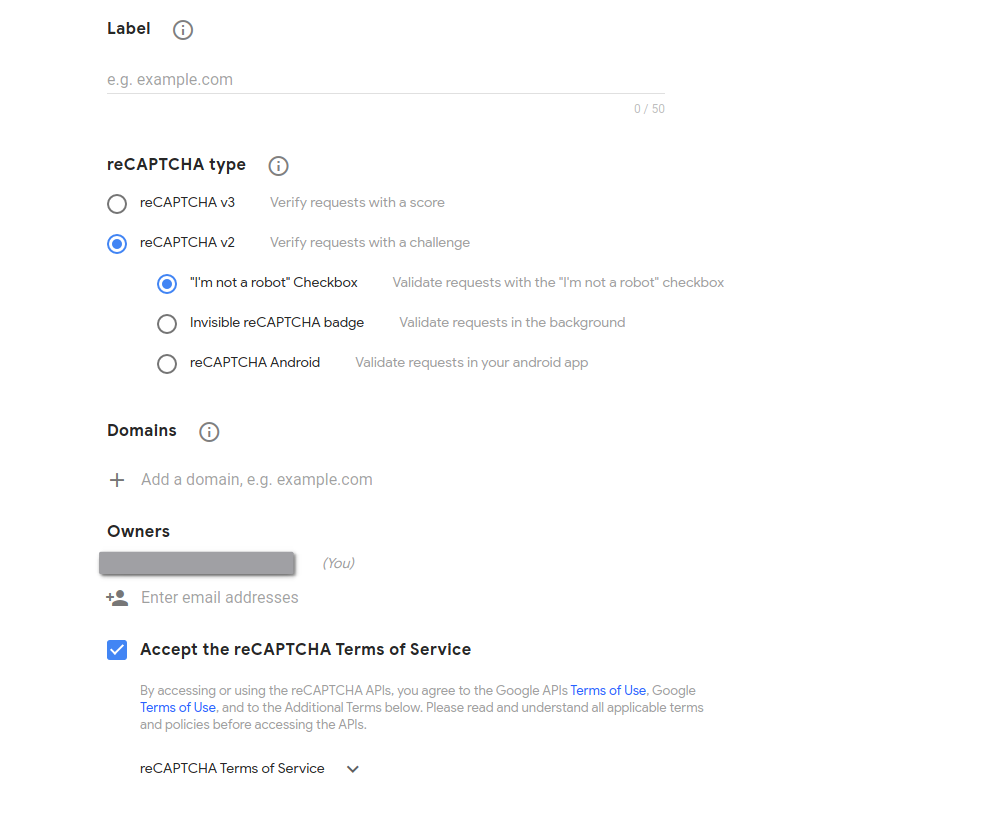
Once the form is filled, we will be presented with two keys.
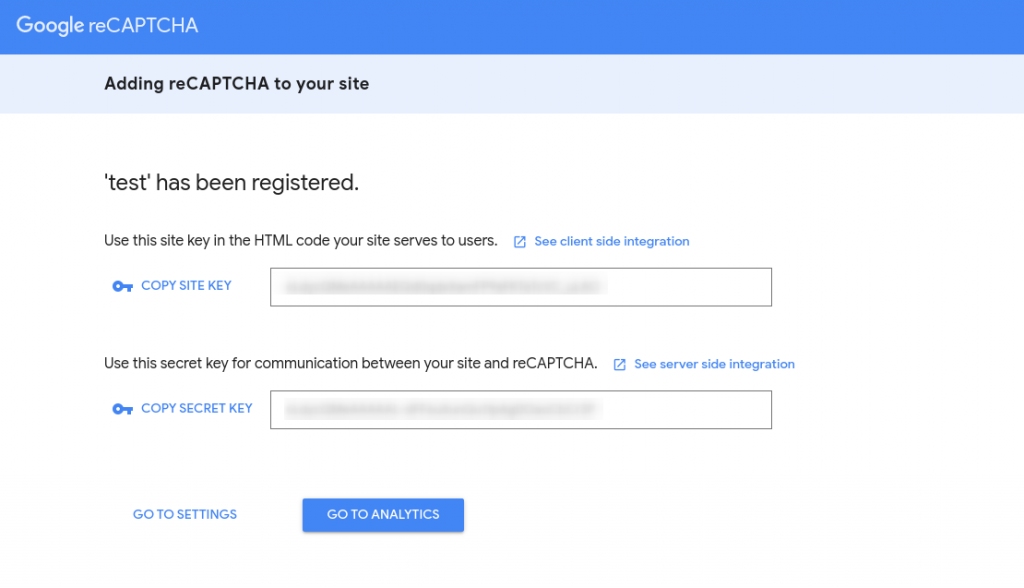
The site key will be served in the web page (Front-end) where as the secret key will be used in the server side (Back-end) to verify reCAPTCHA responses.
If you are on a local development server then click on Go to Settings and untoggle Verify the origin of reCAPTCHA solutions but make sure to toggle it back when you are using reCAPTCHA in a production environment.

Adding reCAPTCHA into the HTML Document
We will add the reCAPTCHA script tag inside the head element as demonstrated in the reCAPTCHA v2 documentation page.
<head>
<title>Contact us</title>
<meta name="viewport" content="width=device-width, initial-scale=1.0" />
<!-- Compiled and minified CSS -->
<link rel="stylesheet" href="https://cdnjs.cloudflare.com/ajax/libs/materialize/1.0.0/css/materialize.min.css">
<script src="https://www.google.com/recaptcha/api.js" async defer></script>
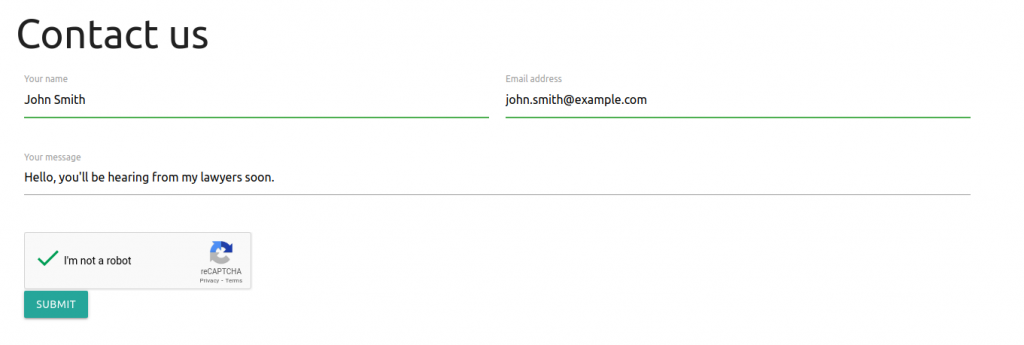
</head>After that’s done, we will add a DIV element with the class name g-recaptcha inside the contactForm element above the submit button.
<div class="g-recaptcha" data-sitekey="YOUR_SITE_KEY"></div>
<button class="btn waves-effect waves-light" type="submit" name="action">Submit</button>
We will make some changes to the JavaScript code too, let’s reset the reCAPTCHA field when the form is submitted.
.then(obj => {
    if (obj.status !== 200) {
        M.toast({
            html: obj.body.result
        });
    } else {
        M.toast({
            html: 'Thank you for contacting us. We\'ll reach out to you shortly.'
        });
        contactForm.reset();
    }

    grecaptcha.reset();
});
Implementing reCAPTCHA v2 into PHP
We will create a PHP class that will send a request to Google’s reCAPTCHA’s API endpoint. It’s not necessary to create an entire class for it, we are creating one to keep things organised and understandable.
class GoogleRecaptchaV2API {
    //  The URL for the Google Recaptcha API
    const GOOGLE_RECAPTCHA_V2_URL = 'https://www.google.com/recaptcha/api/';

    private $secret_key;

    public function __construct($secret_key)
    {
        $this->secret_key = $secret_key;
    }

    public function verify($recaptcha_response) {
        $query = http_build_query(['secret' => $this->secret_key, 'response' => $recaptcha_response]);
        $url = self::GOOGLE_RECAPTCHA_V2_URL . "siteverify?={$query}";

        // You will need php-curl installed in order to use curl functions
        // You can install it by running the following command:
        // sudo apt-get install php-curl
        $ch = curl_init();
        curl_setopt($ch, CURLOPT_URL, $url);
        curl_setopt($ch, CURLOPT_POST, true);
        curl_setopt($ch, CURLOPT_POSTFIELDS, $query);
        curl_setopt($ch, CURLOPT_RETURNTRANSFER, true);

        $output = curl_exec($ch);
        curl_close($ch);

        return json_decode($output, false);
    }
}
Inside submit_form.php, we will add the following code below the reCAPTCHA validation comment.
// reCAPTCHA v2 validation will go here.
if(!isset($_POST['g-recaptcha-response'])) {
    http_response_code(403);
    echo_data_exit(['result' => 'reCAPTCHA invalid.']);
}

$recaptcha_secret_key = 'YOUR_SECRET_KEY';
$recaptcha_api = new GoogleRecaptchaV2API($recaptcha_secret_key);
$recaptcha_result = $recaptcha_api->verify($_POST['g-recaptcha-response']);

if(!$recaptcha_result->success) {
    http_response_code(403);
    echo_data_exit(['result' => 'reCAPTCHA invalid.']);
}
We have a fully functional contact us web page that uses reCAPTCHA v2 with PHP as the back-end to store the contact data.